Why Choose DIY Indoor Gardening Containers?
Making your own DIY container is a better option in indoor gardening for several reasons. It not only saves money but also makes creative choices, well-designed and unique from others.
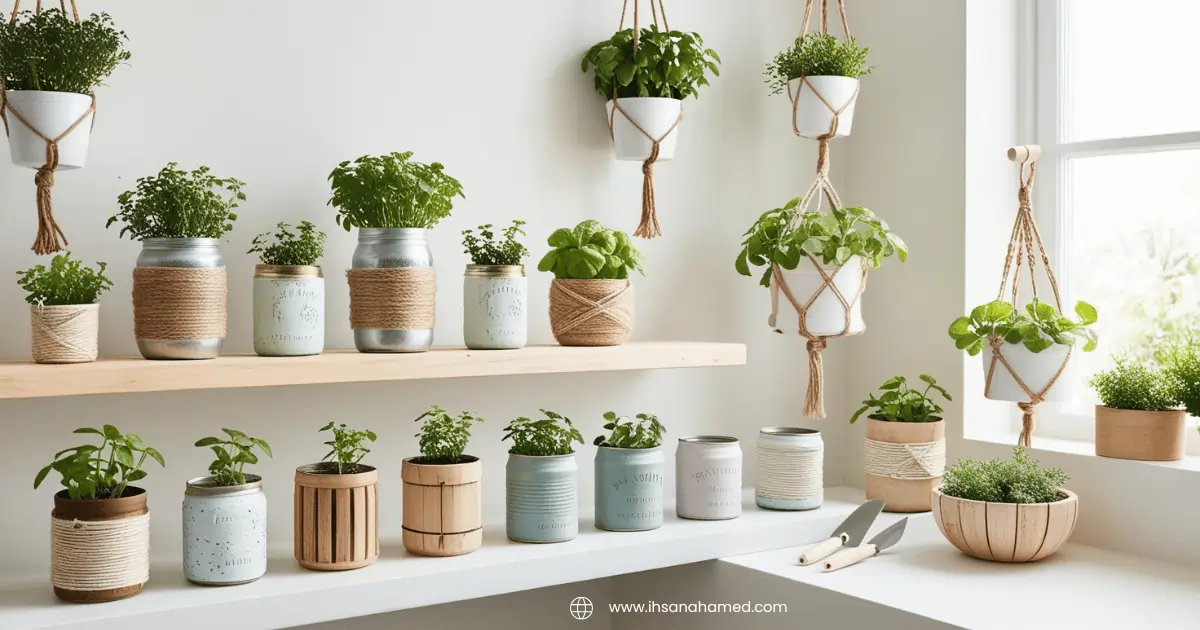
You can use eco-friendly materials already available in our homes for a beautiful indoor garden.
Cost-Effectiveness and Creativity
DIY containers can save a lot of money compared to commercial pots and planters which are very expensive, especially if you grow a lot of plants.
You can use items such as old jars, tins, cans, and wooden crates, this can make your garden budget-friendly and add a personal touch to it.
1. Mason Jar Planters
Mason jar is a classical item to transform into beautiful planters. This clear jar is suitable for any space, it’s the right size for herbs, succulents, and small houseplants.
Essential items and tools
- Small spoons and small trowel
- Mason jars
- Pebbles and small rocks
- Potting soil
- Small plants such as herbs, succulents
Process
- Make sure the mason jar is clean, neat, and dry
- Add stones and pebbles on the bottom of the mason jar for drainage use.
- Add the high-quality potting soil or DIY soil mix over the stones and pebbles.
- Plant your seed or seedlings above the soil and cover the roots inside the soil mix.
- Water the plants gently.
- Place the plant near the window for sunlight or use grow light as per your indoor gardening space.
2. Tin Can Pots
An old tin can turn into stylish planters, it looks metallic and paints them to match your décor. These pots are perfect for herbs and small plants and add a touch to the creativity.
Essential items and tools
- Hammer and nail
- Paintbrush
- Used tin cans
- Potting soil
- Small plants
- Paint
Process
- Remove the labels on the tins and make them dry before use.
- Add drainage holes at the bottom by hammering the tin into small holes.
- Add acrylic paint for a classic look.
- Add potting soil or DIY soil into the can.
- Place the plant on the soil and cover the roots.
- Water them and place them on windows or grow lights.
3. Tea cup Planters
Vintage tea cups can be easily turned into a simple planter whether it is missing from the old set. These planters give a personal touch to your space, perfect for tiny succulents.
Essential items and tools
- Small spoons
- Small trowel
- Drilling equipment’s
- Vintage tea cups and saucers
- Potting soil or Homemade soil mix
- Small plants like succulents
Process
- Clean the tea cups and make sure there are no tea stains.
- Drill a small hole with equipment carefully without being damaged by the drainage hole.
- Use a spoon to fill the soil and keep it tidy.
- Place a plant over the soil.
- Water it and place it on a grow light.
4. Plastic Bottle Hanging Planters
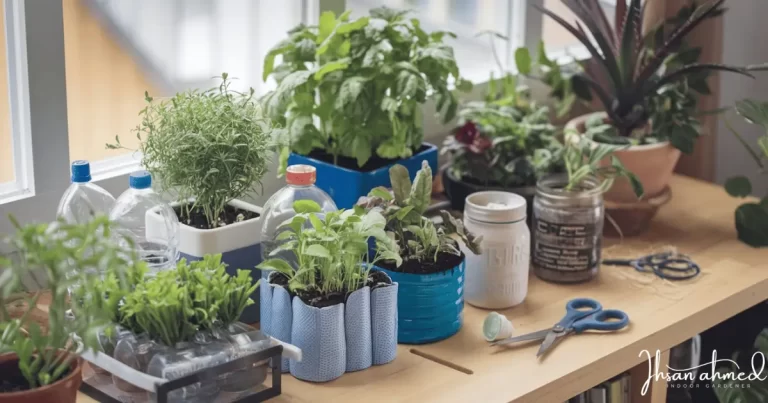
Plastic bottles are not only eco-friendly but also a funny way to keep your home. It’s perfect for herbs and small trailing plants that are easy to hang on a sunspot at home.
Essential items and tools
- Scissors and punch holes
- Plastic bottles
- String or twine
- Potting soil
- Small plants
Process
- Wash the plastic bottles, remove the labels cut them with scissors into 2 pieces, and use the bottom for planters.
- Use a punch hole to make two holes on the top on both sides for hanging.
- Cut a piece of string into the holes on both sides and tie the knots to secure it.
- Fill the soil on the bottles, add a plant over the soil, and water it.
5. Terracotta Pot Art
Terracotta pot is a classic and better choice for indoor gardening. We need to add some paint over it to make it colorful because it looks plain, this will make a unique touch for your home.
Essential items and tools
- Paintbrush and paint tape
- Terracotta pots
- Acrylic paint
- Potting soil
- Small plants
Process
- Wipe down the pots with a paintbrush to clean and remove dust on the pots.
- Decide a design before painting and use paint tape to draw links for designing the planters.
- Use acrylic paint to decorate, add 2 layers of paint for bright looks, and wait a little bit to dry before applying the second layer.
- Once the paint is dry, add soil into the planters for planting.
- Now the plants are ready and it’s time to water them and enjoy indoor gardening with homemade materials.
6. Wooden Box Planters
Wooden crates make great looks and are perfect for making small plants together and displaying a group of herbs in the kitchen. These look natural and functional with little effort.
Essential items and supplies
- Scissors, stapler, and glue
- Sandpaper
- Small wooden crates or boxes
- Potting soil mix or handmade soil
- Plants
Process
- Clean the wooden boxes from dust and use sandpaper to smooth the edges from rough and sharp.
- Use a scissor to cut the plastic liner to fit inside the box glue and staple it to prevent wood from moisture.
- Add potting soil into the lined boxes and make sure the soil is below the edges.
- Arrange a plant and place it over the soil.
- Water them and place them in the kitchen or window light.
7. Egg Carton Seed Starters
Egg cartons are perfect and eco-friendly for starting indoors at the seed level. It is biodegradable and you can plant them in containers when they are ready to grow.
Essential items and supplies
- A small spoon, a small trowel, and scissors
- Egg cartoons
- Potting soil
- Seeds
- Watering can
Process
- Cut the lids of the egg carton and use it as a tray under the cup.
- Fill the soil over the cup with a spoon.
- Follow the seed packet instructions to seed the plant into the soil.
- Water them and place them in a nearby sunny window or grow light.
- Once the seedlings are stronger, cut the egg cups and place them in a bigger pot.
8. Concrete Planters
Concrete planters are industrial looks for indoor containers, it’s durable, easy to move, and customized for different shapes and sizes.
Essential items and supplies
- Mixing containers, sandpaper, and stirring sticks.
- Concrete Mix
- Water
- Molds
- Plants
Process
- Pick the mold and grease it with oil to remove it later.
- Mix the concrete mix and add water to it, use stirring sticks to mix until it becomes thick and smooth as per the package information.
- Pour concrete into the mold and place small objects with holes at the center of the mold for drainage holes.
- Let the concrete dry for 24 hours to remove from the mold.
- Use sandpaper to smooth the edges.
- It’s time to add soil, plant it, water it, and place it on a grow light or sunny window.
9. Colander Planter
It’s quick, functional planters and perfect for hanging herbs and flowers. Drainage holes are important to prevent waterlogging.
Essential items and supplies
- Chain
- Scissor
- Metal colander
- Potting soil or handmade soil
- Plants
Process
- Clean the colander and make sure there are no food particles.
- Add chains on the side of the colander to hang them.
- Add soil into the colander up to 3/4 quarters full make it one-quarter empty and add drainage holes into it.
- Place the plant and cover the roots in the soil, water them, and place it on a sunny window or grow light.
10. Ceramic Mug Planters
Old ceramic cups are perfect for small planters and add a unique touch to your space. These planters are the right size for herbs, succulents, and small flowers, use the mug which is not useful for drinking.
Essential items and supplies
- Spoon and a small trowel
- Drill with a ceramic bit
- Ceramic mug (old or not used for drinking)
- Potting soil and DIY Mix
- Small plants
Process
- Make sure the ceramic mug is clean and dry.
- Add drainage holes carefully at the bottom of the mug to prevent waterlogging.
- Add high-quality mix or handmade mix soil into the mug.
- Plant them over the soil and water them lightly, if there are no drainage holes but we have drainage holes at these planters.
- Enjoy these homemade planters from homemade materials.
- Place it on grow light or sunny windows.
11. Book Planters
You can easily convert old thick hardcover books into planters, it’s a creative way to combine and it is complicated. I will explain easily what you can do from your home.
Essential items and supplies
- Knife, glue, and scissors
- Old and thick hardcover book
- Plastic liner
- Potting soil or DIY MIX
- Air Plants and succulents
Process
- Select a thick and hard cover to hold small plants.
- Cut a rectangle shape on the middle of the pages and leave half-inch for borders.
- Place a plastic liner inside and glue it to protect it from moisture.
- Add potting soil or DIY mix inside the book planters.
- Place the air plant inside the soil and keep a root inside.
- Water them slowly and avoid waterlogging.
- Place it on a grow light.
12. Light Bulb Terrariums
Turn your old light bulb into Planters, these are tiny and hanging. It gives a modern touch to space and is perfect for small plants such as moss and air plants.
Essential items and supplies
- Pliers and screwdriver
- Old light bulbs
- Small Plants
- Tweezers
- string
Process
- Use a plier and screwdriver to remove metals and inner parts of the bulb.
- Clean and remove the dust inside the bulb area.
- Use tweezers to place plants inside the bulb.
- Use string and screw it on the metal base for hanging.
- Place it to grow light after adding soil, plants, and water.
13. Painted Tins
Use old cookies or metal tins and add a layer of paint to turn them into planters. Painted tins have classical looks and are perfect to grow a variety of plants, and add a personal touch to the garden.
Essential items and supplies
- Paintbrush, hammer, nail, and sandpaper.
- Cookie tins and metal tins
- Acrylic paint
- Potting soil or DIY mix
- Herb plants
Process
- Make sure the tin is clean and dry, and remove labels and stickers before using.
- Add a small hole for drainage at the bottom of cookie tins with a nail and hammer.
- If the edges are sharp and rough, use sandpaper to smooth them.
- Paint the tin with acrylic paint, add 2 to 3 layers of paint for classic looks, and wait for dry between each coating.
- Once the paint is dry add soil into it.
- Place a plant on the soil with roots.
- Add water slowly and deeply.
- Enjoy DIY indoor gardening containers by placing a plant on grow lights.
14. Milk Carton Planters
Turn your every waste into planters to grow herbs and small flowers, milk cartons are a perfect example. It makes it more fun with kids enjoying these planters when the paint is added along.
Essential items and supplies
- Scissors, paintbrush, hammer, and nail.
- Empty milk cartons
- Potting soil
- Paint
- Herb plants
Process
- Clean the milk carton completely from milk residue.
- Cut the top of the carton and adjust the height based on plant needs.
- Add a few holes for drainage at the bottom of the carton.
- Add a vibrant color for a nice look and fine design.
- Add soil into the carton when the paint is completely dry.
- Place a plant into the soil and cover the roots.
- Water them and place them on grow lights.
15. PVC Pipe Planters
PVC pipes are durable materials, they can transform into mode and space-saving planters for your home. It’s perfect for vertical gardening and it is perfect for herbs and trailing plants mounted on a wall for unique designs.
Essential items and supplies
- Saw, drills, and sandpaper
- PVC pipes
- Potting soil or DIY Mix
- Herb plants
- Strings or buckets
Process
- Use saws to cut the PVC pipes into pieces.
- Use sandpaper to smoothen the edges, it may harm the plant if it is rough.
- Drill a small hole in the bottom of each pipe.
- If you want to hang it, use a drill and use strings to screw them, and make sure it is strong for hanging.
- Add potting soil to each pipe section and leave 1/4 empty at the top.
- Place a plant over the soil and make sure the roots are covered.
- Water them and make them ready for hanging and enjoy indoor gardening.
Conclusion
DIY indoor gardening containers are fun and easy for bringing nature into your home and bringing creativity. From recycling jars to bottles, you can make unique eco-friendly designs that fit your space.
you need further guidance on start your indoor gardening on tiny homes, 17 essential indoor gardening supplies you need and 13 must have indoor gardening tools.
It’s a great way to start your own herbs and veggies through the year without spending a lot on containers. Now you have some ideas, it’s time to gather material and start planning. Indoor gardening is not so complicated, experiment and enjoy nature with your family.
Why should I use DIY containers for indoor gardening?
DIY containers allow you to create budget-friendly and customized options using everyday household items. They are eco-friendly and give your indoor garden a unique, personal touch, all while saving you money.
What are some common household items I can use for DIY gardening containers?
You can use items like mason jars, tin cans, tea cups, plastic bottles, wooden boxes, and even old light bulbs to create functional and stylish planters.
Are DIY gardening containers suitable for small spaces?
Yes! DIY containers are perfect for small spaces as they can be customized to fit any area, from windowsills to small shelves. Options like hanging plastic bottle planters and compact tea cup planters work well in limited spaces.
Do I need special tools or materials for DIY indoor gardening containers?
Most DIY containers require simple tools like scissors, hammers, and paintbrushes. Common materials include potting soil, pebbles for drainage, and basic household items such as jars, cans, and cartons.
Can I grow a variety of plants in DIY containers?
Absolutely! You can grow herbs, succulents, small flowers, and even air plants. The versatility of DIY containers allows you to choose the right size and style for each plant.
