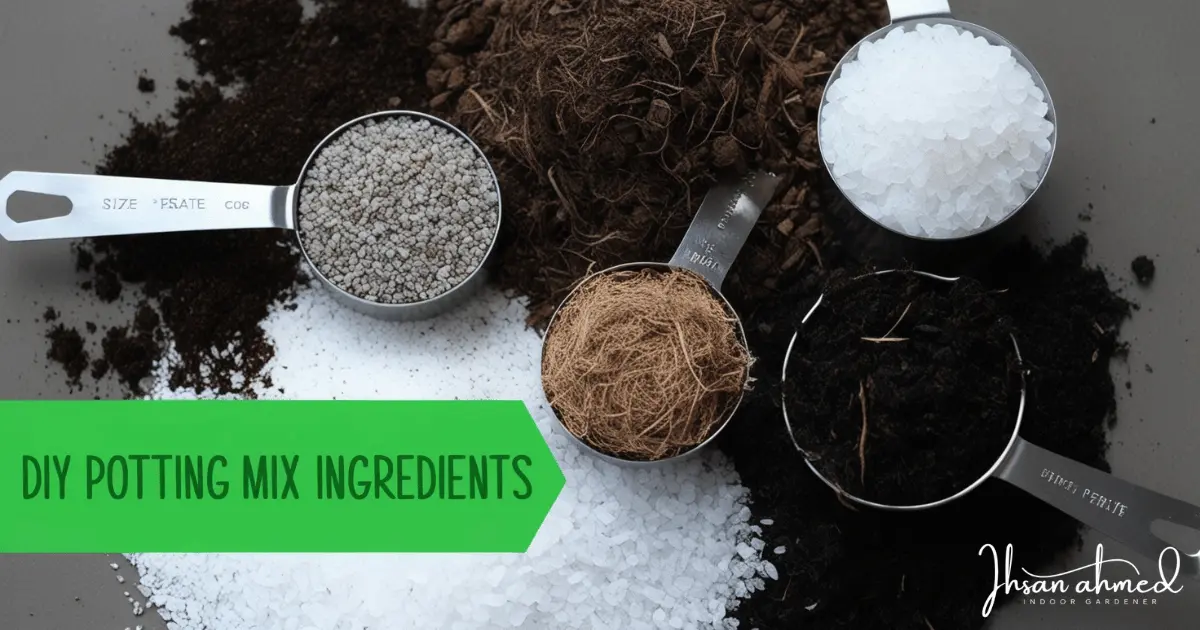
Benefit on DIY potting mix ingredients?
Cost-Effective Customizable for plant needs Better drainage and aeration Free from chemicals Sustainable and eco-friendly Are you excited, and ready to dig in?
1. Coco Coir SoilCoco coir is a natural fibrous material from the husk of coconut and an alternative to peat moss. It is widely used in gardening and is extracted from the outer shell of the coconut and is available in various shapes and sizes like bricks, fibers, and chips.
Required Materials
Coconut Husks Water Machete Scrubbing brush Large container or bucket Fine sieve and lime – Optional Turns coconut husks into coco coir Soil
Break the coconut and extract the outer husks. Use a large container or bucket to soak the husks for at least 2 weeks. After soaking, fibers are easy to separate, use a scrubbing brush to remove the fiber and make it into small pieces. Wash the coir for at least a few hours and remove salt from it add lime to neutralize the pH. Use sunny spots to dry for several days. Chop the coir, if you need a fine mix, and enjoy. Benefits of Coco coir soil for Indoor Gardening
Holds water efficiently Improve air circulation Eco-friendly and sustainable Allow excess water to drain to avoid overwatering Coco coir soil has a neutral pH and doesn’t require adjustments. Free from disease Lightweight and easy to handle Promote root health and help indoor plants to grow healthy. Tips while making Coco coir soil
Soak coco-coir with a liquid fertilizer such as fish emulsion or seaweed extract to give a boost to plants from starting. Mix with slow-release organic fertilizers that are bone meal, and compost to receive continuous nutrients over a period of time without requiring fertilizer frequently. Mix coco-coir with worm castings (20-30%) to improve microorganisms. Coco-coir helps the plants to regrow after harvesting. In a hydroponic system, coco coir soil acts as a medium. For herbs like basil or mint, frequent harvest can’t harm the plants due to coco-coir. Maintain the rich coco-coir to enjoy multiple harvesting cycles. 2. Compost Soil MixCompost is an organic matter that breaks down and decomposes to nutrients. It is a natural process of recycling organic waste such as vegetables, fruits, yard wastes, leaves, and biodegradable materials.
Usually, it takes from 3 months to 7 months to process it based on bin capacity, scrap sizes, the ratio of green and brown materials, maintaining moisture level, turning the pile regularly, and maintaining the right temperature.
Required materials
Green materials (1 part) such as vegetable peels, fruit scrap, coffee grounds, tea bags, eggshells, cut grass, soft leaves, and stems Brown materials (2-3 parts) such as fallen leaves, newspaper, cardboard, office paper, straw, and small wood chips. Water Compost bin Compost accelerator pH test kit – optional Turns kitchen wastes into compost Soil Mix
Before you start, make sure green and brow materials are ready. Choose the location where you want to start and select a proper bin for indoor and outdoor. Add kitchen wastes in a ratio of 1:2-3, of green and brow materials, the recommended is 3. Sometimes, it becomes smelly during the process, so it needs more brown materials. Maintain moisture by adding water and brown materials depending on dry and wet conditions. Open the bin every 2 weeks, use a fork or shovel to mix it, and keep it open for at least 3 days for smaller and 7 days for larger bins. Maintain the right temperature. When the compost became black, crumby, and natural smell, ready for harvest. Benefits of compost soil mix indoor gardening
Encouraging strong healthy root systems. Alternative to chemical fertilizers Retaining the moisture level promotes healthy microbes and is free from diseases. Improve the pH balance of container soil. Rich in nutrients like NPR (Nitrogen, phosphorus, and potassium) Tips while making compost soil mix
Chop and scrub the waste into small pies Maintain the ratio of 1 part green materials and 2-3 part brown materials. If it is too dry add water to it and if it is too wet, add brown materials to maintain the moisture. Maintain a warm temperature between 120°F to 160°F Use multiple smaller compost bins to monitor easier to make quick food for your plants Avoid dairy products, fish, meat, and oil foods, it may take more time to decompose. Use compost activators to speed up the process, especially in the early stages. 3. Pine Bark potting soilPine bark is naturally collected from pine trees when it is fallen, which is an outer covering. Pine bark is commonly used indoors to improve soil aeration, drainage, and overall plant health.
Required Materials
Pine bark Knife Shredding and chipping tools (Machine) Pruning shears, shaws, and axe (Manual method) Sieve or Mesh Screen Water Gloves and protective gear Mixing materials (Optional) Mixing tools Make your own pine bark potting soil from pine tree
Select a Pine tree that is healthy and avoid taking bark from living parts, it could damage the tree and use only the outermost layer. Gently peel the outer layer using the knife and aim for manageable size. If you have access to multiple trees, collect from different bark to have varieties in materials. Wash the collected bark with water to remove dirt, dust, and insects, which is essential before processing. Use shredding(if you have one), Pruning shears, shaws, and an axe (Manual method) to break into small pieces aiming at 1-2 inches which is good for indoor gardening. Use a Sieve or Mesh Screen with small holes around 1/4 to 1/2 inch to separate the larger parts, small pieces are perfect for well drainage. Use the large parts to mix with the compost. Sometimes bark becomes dry, then add water using a spray bottle or small watering and avoid soaking. You can mix the bark with other materials such as Perlite or Vermiculite, Compost, and Peat Moss or Coconut Coir. The ratio for mixing is 50% pine bark, 25% Perlite or Vermiculite, and 25% Compost and Peat Moss or Coconut Coir. Mix with large containers or wheelbarrow through garden trowel and shovel to blend. Test the soil before using it for plants, if it is heavy add with perlite or vermiculite, and if it is loose add a little compost to make it perfect for indoor plants. Store and enjoy indoor gardening. Benefits of Pine Bark potting soil Indoor Gardening
Improve drainage and provide oxygen through the container to reach the plant roots. Keep the plants healthy longer and slow down the decomposing process. Lightweight and easy to handle Natural and organic Prevent overwatering and reducing the frequency of watering. Provide natural mulch to reduce the consumption of synthetic fertilizers. Preventing the growth of weeds. Tips while making pine bark potting soil
Mix pine bark with potting soil to help plants like tomatoes, peppers, and herbs. Add 2-3 layers of pin bark on the surface of the containers after planting to give a consistent moisture level. Pine bark allows air to circulate Use pine bark in compost to give balanced nutrients. Mix pine bark with slow-release fertilizer to give nutrients over time, which are beneficial for tomatoes and peppers. 4. Worm Casting soilWorm castings are also called vermicast or worm manure, it is rich in nutrients that boost the soil fertility to grow plants healthy. These castings look like dark and crumby soil, which is considered the most natural fertilizer and referred to as black gold.
What worm casting soil contains
Essential plant nutrients such as Nitrogen, Phosphorus, and Potassium (NPK) Micronutrients include magnesium, zinc, iron, copper, manganese, and boron, Which are important for plant processes. Contains decomposed organic materials Neutral pH levels around 6.5-7 Produce natural stimulants like cytokinins and auxins. Required Materials
Worm Bin Bedding materials like shredded paper, coconut coir (rehydrated), Peat moss (Without Chemicals) and Straw or dry leaves Earthworms Organic wastes are vegetables and fruit wastes, coffee grounds, tea bags, crushed egg shells, and rice or pasta. Moisture and water. Cover materials like newspaper. Ventilation and drainage. pH balancer and Thermometer. Golden fork or small trowel. Make Worm Casting Soil
Select a bin made of plastic or wood with a lid and 10-gallon is ideal for beginners. Drill small holes (about 1/8 inch) on the sides and (1/4 inch) at the bottom. Place the bin in cooler or no shadow areas and maintain a range of 55–77°F Add a soaked bedding material about 4-6 inches deep. Use Red Wigglers best for composting (roughly 1,000 worms) around 1 pound. Leave the lid for 15 minutes. Add organic wastes in small quantities with one corner and 1 pound of waste every week. Maintain the moisture by adding water if it is dry and add bedding materials if it is wet. After 2-3 months, the bedding looks dark, crumby, and earthy smell, it’s a sign worm casting is ready. Benefits of Worm Casting Soil
Worm casting contains macronutrients (NPK) and micronutrients like calcium, magnesium, and iron to promote a healthy root system. Loaded with beneficial microorganisms to protect container plants from root rot and fungal diseases. Reduce the consumption of fertilizer and it provides slow-release nutrients. Maintaining a neutral pH level of 6.5 to 7 is an ideal ratio for many indoor plants. Perfect for small spaces, free from pests and unpleasant smells. Hormones like auxins and cytokinins provide rapid germination to boost growth in vegetables and herbs. Maintaining an eco-friendly environment without chemical pesticides. Tips while making worm casting soil
Mix worm casting and potting soil in 1:4 for vegetables and herbs. Add a thin layer of castings for slow release in the soil for consistency. Add casting in water and keep for 24 hours to create liquid fertilizer for indoor plants. Maintain a ratio of 2:1 of bedding materials and food waste during the worm casting process. Avoid overfeeding Avoid food wastes such as meat, dairy, oil foods, and highly acidic items like citrus. Inspect regularly and sprinkle crushed egg shells to neutralize acidity. 5. Indoor Gardening Soil Garden soil is a specialized natural topsoil that contains compost, peat moss, and manure, it is designed to improve soil fertility.
This soil can also be adapted for indoor gardening with proper modification and it improves the overall fertility and texture of the mix.
Required Materials
Topsoil Organic compost Peat moss Perlite Vermiculite Sand Organic Fertilizer Worm casting Lime Tools required – Large container or wheelbarrow, shovel or golden fork, and measuring cup Make Indoor gardening soil
Make ready the containers and tools Measure your ingredients with a measuring cup Topsoil (1 Part) organic compost (1 Part) Peat moss or coco-coir (1/2 Part) Perlite (1/4 Part) Vermiculite (1/4 Part) Sand (1/4 Part) Organic fertilizer (Handfull of fish meal or bone meal) Worm casting (1/4 to 1/2) per cubic foot Add topsoil and organic compost and stir them for even distribution. Add peat most and worm casting. Stir the perlite to make the soil lighter Add coarse sand if it is too hard (Fine sand can make it worse) Add organic fertilizer for a natural boost Use a soil pH tester(if is below 6), and add lime to neutralize. Check the soil consistency, if it is wet add perlite or sand, if it is too dry add peat moss or vermiculite. Store in a large container to keep fresh. Benefits of Indoor gardening soil
Perfect customized mix based on plant needs. Slow release nutrients, rapid growth without chemical fertilizers. Keep the plants hydrated consistently to avoid the frequency of watering. Prevent root rot and plants receive adequate oxygen to their roots to boost the root systems. The plant grows faster, and stronger, absorbing nutrients and keeping the pH level neutral. Healthy balanced soil, ability to fight against pests and diseases. Cost-effective and eco-friendly, natural reducing the waste by recycling natural materials. Easy to handle, can be stored in a compact size, and perfect lightweight mix for indoor gardening. Tips to turn indoor gardening soil
Balance the ingredients in the right proportion Sterilize your soil mix Add mycorrhizal fungi to promote a healthy root system. Adjust the mix for plant needs, add perlite or sand extra for succulents and cacti, and increase the qty of coconut coir or peat moss for basil, parsley, and thyme. After mixing the soil, allow a few days to settle in the soil for the best results. Add slow-release fertilizers like bone meal and blood meal for extra nutrient boost. Add a thin layer of natural much after planting. 6. Leaf Mold mulchLeaf mold is a type of organic material made on fallen leaves by decomposing through fungal activity. It relies on fungi from leaves to dark and crumby substance, it takes several months to a year to produce.
How is Leaf Mold Mode Used Indoor Gardening?
Mix into the heavy soil to improve drainage and texture. As mulch, a thin layer over the soil in the containers Combine with compost, perlite, and coco-coir for a balanced potting mix. To keep the plants hydrated without overwatering. Required Materials
Fallen leaves Water Container Golden fork or hand trowel Pruning shears Cardboard Finished Compost Time – usually 6-12 months Make Leaf Mold mulch
Gather fallen leaves from oak, maple, beech, vegetable, and herb leaves that are healthy. Choose a container that is plastic, a compost sack, and add a few small holes in it to give airflow and oxygen to reach the leaves. Add thin layers of leaves at the bottom and press them down to pile. Apply water on each layer of leaves not to soak but gently push it down and repeat the process until the bin is full. Add finished compost into it to decompose faster than usual. Add fungal inoculant to speed up the process. Cover with a Plastic sheet to create an ideal environment for decomposition. Every 2-3 weeks turn open and mix with golden fork or trowel to allow oxygen to reach the leaves and close it after 10 minutes. If the leaves are dry add a few drops of water, if it is wet add a few dry leaves or straws to balance them. It typically takes 6 months to a year to complete the process If it is fully decomposed, it looks like dark and crumby soil. Benefits of Leaf Mold Mulch
It improves the soil structure from heavy to loose soil and a breathable environment for plant roots. Keep the soil moisture consistent without waterlogging. Rich in beneficial microorganisms and boosts nutrients especially hungry plants like tomatoes and herbs. It acts as a natural mulch and keeps the soil cool during summer and keeps the soil warm during winter. It is ideal for most indoor plants to keep pH neutral. Leaf mold is a great way to reduce garden wastage. Tips on leaf mold mulch
Shredd the leaves into small ones to decompose faster. Cover with plastic board or cardboard to keep the ideal environment. Leaf mold decomposes faster with the right temperature around 60–70°F. Avoid using waxy leaves and black walnut trees. Mix with carbon-rich materials like newspaper, straw, cardboard, and wood chips. Be patient for 6-12 months. 7. Charcoal SoilIt’s not normal charcoal which is used for grilling and cooking, it contains additives that can be harmful to plants. Briquettes are a type of charcoal, that can release harmful gases or chemicals when burned and is highly dangerous to any type of plant.
Horticultural charcoal or activated charcoal is often used for gardening. Generally, these charcoal are pure with no harmful additives and safe for plants, made from natural hardwood and coconut shells.
Materials Required
Hardwood, bamboo, or coconut shell Metal container or steel drum Wood stove or open fire outdoors for safety. Shovel or tongs to carry hot materials. water How to Make Horticultural Charcoal Soil (from Raw Materials)
Cut them into small pieces or chunks Set up campfire and used metal containers Can add wood ashes from the previous batch Keep on moderate size fire Seal the container to keep the oxygen out, which is crucial for charcoal Let it burn for 2-4 hours depending on the size, allow wood to heat up not burn into ash. Check the container with a shovel to look at the situation of the wood. Remove the metal container carefully from fire and keep it cool for several hours. Open the container and inspect the materials. You should find the dark and carbonized piece, which is ready to use. If you forget to chop or chunk into small pieces, you can do this time again with a hammer or mallet. How to Make Activated Charcoal Soil (from Horticultural Charcoal)
Make sure charcoals are in smaller sizes, charcoal is clean without any ash or debris. Use gloves, goggles, and masks before starting this process, which is a more important safety procedure. For calcium chloride – 1 part calcium and 2 parts water. For potassium hydroxide – 1 part potassium and 5 parts water. Let it soak for 24 hours to start penetrating the charcoal to open up the pores. After 24 hours drain the solution and use clean water to rinse with the help of a stainer. Rins out until the water is clean, and indicated chemicals are removed. Place the charcoal in the open ventilation area to keep it dry or dry it in the oven at 250°F for 1-2 hours to speed up the drying process preferably in open ventilation. Then, heat it at 900-1,000°F around 1-2 hours. You can use your oven. Preheat it to 450-500°F and place the charcoal in the baking tray. This process must be done outdoors or well-ventilated area that can release high temperatures. Remove the charcoal from the kiln or oven and let it cool in a safe area. Optionally you can powder it to use, which is often used in water filtration. Summary of Do’s and Don’ts While making Charcoal SoilHorticultural Charcoal soil
Do’s
Use dry and clean wood Work in well-ventilated areas Ensure fire safety Allow charcoal to cool before using Don’ts (Important)
Dont use wood with chemicals Dont overload the containers Dont use wet woods Don’t rush the process Activated Charcoal Soil (from Horticultural Charcoal)
Do’s
Wear protective gear Use safe and nontoxic chemicals Use high-temperature oven Use in the well ventilation area Don’ts(Most Important)
Dont use wet charcoal Dont handle chemicals carelessly Dont skip the rinsing steps Dont heat without proper ventilation Dont rush the heating process Conclusion Now you have the knowledge to create your own DIY potting mix ingredients based on plant needs and receive balanced nutrients, moisture, and soil aeration.
This personalized approach helps to grow your plants healthy and stronger. After experimenting you have a unique and different approach to create your potting mix formulas.
Now it is time to learn more and read further on how to start your indoor container gardening and 13 different unique DIY ideas to make your own grow bags .
Explore more about 15 indoor container gardening ideas , Important essential indoor gardening tools for every gardeners, and Learn how to make your tools ready at any time with simple storage hacks .
Most Frequently Asked Questions
Why is a DIY potting mix better for indoor gardening?
A DIY potting mix is cost-effective, customizable for specific plant needs, and free from harmful chemicals. It provides better drainage, aeration, and sustainable gardening by reusing organic waste.
How do I make coco-coir for indoor gardening?
Coco-coir is made by soaking coconut husks for two weeks, separating fibers, and washing them to remove salt. After drying, it can be chopped for use in gardening. It improves water retention, drainage, and root health.
What are the benefits of using compost in a potting mix?
Compost enhances soil fertility, provides essential nutrients, and retains moisture. It supports healthy root systems, maintains a balanced pH, and replaces chemical fertilizers for eco-friendly gardening.
How do worm castings help indoor plants?
Worm castings are rich in macronutrients (NPK) and micronutrients like magnesium and calcium. They enhance soil fertility, promote rapid germination, and protect plants from fungal diseases while maintaining a neutral pH.
Can I use garden soil directly for indoor plants?
Regular garden soil needs modification before being used indoors. By mixing topsoil with compost, peat moss, perlite, and worm castings, you can create lightweight, nutrient-rich soil suitable for indoor plants.
